Saturday, December 20, 2014

Printable Christmas Tags


Today I am sharing with you some FREE downloadable, Christmas tags. 
Am I the only one still obsessing over black and white? I would have loved to have added a few B&W items to my holiday decorations but since we're moving on Christmas eve, I was unable to buy any new Christmas decor...according to my husband.
And so with that, I am living vicariously through these tags, dreaming of what my place would have looked like if I could have fully decorated this year. 
Oh well, maybe next time! 
Happy Saturday!

Click the link below to print out your own tags for your presents under the tree.

iheartnaptime

Thursday, December 18, 2014

Christmas Cookie Series #5: Gingerbread House

Oh man. 
Have you ever over estimated your ability to do something, and then just laugh hysterically when you fail at it?
 That is exactly what happened to me when I made our gingerbread house this year.
 I made my first, from scratch, gingerbread house last year and I remember being surprised at just how easy it was.
 Sure, it was a bit time consuming, but it wasn't hard and I really enjoyed doing it. I kept that in mind, and I set out to do the same thing this year. 
I made the mistake of not saving the recipe I used last time and couldn't find it anywhere, 
I checked out so many different recipes before I settled on one. 
I finally found "the one"and I went with this Food Network recipe. 
I then used a template I found on Martha Stewart. 
After I had cut out the walls and front/back, I realized the template did not provide the roof. 
All it said was measure out 2 pieces that were 6.5in x 7.5 in. 
Well, I totally underestimated my talent in eye ball measuring. 
I thought for sure I was spot on with the sizing...and then I tried to glue it onto my walls and realized I was about an inch short. Ha.
 I figured I'd just glue it on anyways and cover the huge open gap with frosting and gum drops. 
The next day when I was going to decorate it, I noticed that one side of the roof had fallen off and that it broke into 2 pieces. I then noticed the other side was bending and starting to cave in. 
At that point, I threw the whole thing in the trash.
A week later I decided to give it one more shot. I wasn't going to go down in flames.
 I whipped up another batch of gingerbread, this time using this recipe and baked it for 15 minutes at the suggested temperature. 
I then left it in a 200 degree oven for another 30 minutes to make sure it was really hard. 
And I let it dry in the oven (turned off) all night.
I used this template for the house and love the look of it. 

Evan was a pro decorator and had so much fun placing, and eating, the candies on the house. He still points to the house everyday and says, "See, it's me house!"

Now, I just need to remind myself to revert back to this post next year, so I don't give myself another big gingerbread house headache. 
Sorry for the long boring story, but I felt I needed to explain myself to make me feel better :)

A platter filled with candies. I think my favorites are the Necco waffers. I'm slightly obsessed with how (half) of the roof turned out
I know, you're jealous of my amazing icing skills. 
It's pretty, right?

Evan totally made this gingerbread house, a gingerbread house. I had high hopes of keeping it uniformed and mess free, but I love it more this way. I couldn't not let him help me on the big house. His eyes had that sparkle and honestly, it was more important that he have fun memories of decorating than for me to be a Grinch about what my expectations were of how it was supposed to look. 

(I apologize if this post sounds scattered. We are in the midst of some changes around here and to say I am beyond exhausted would be an understatement.)

To see the rest of the cookie series, head on over to here

Wednesday, December 10, 2014

A Dreamy White Christmas

I have been planning this party in my head since last Christmas. I knew I wanted the look to be soft and wintry. And because it was going to be a just girls Christmas party I wanted to keep it frilly and feminine. And I seriously love how it turned out.
My sweet friend, Kendra, came over early to help me set up and to pitch in a few goodies for the party. Even with a second pair of hands it still took several hours to set up. I have no idea how, but it did. But like I've said before, it's way more fun to throw a party when you have someone fun and creative doing it with you. 
I spent 3 days baking and 3 days cleaning.
And I have yet to make a meal in my kitchen since the party...we're on a break right now. 
We spent too much time together.
I really did have so much fun planning and setting up this party. I love taking an idea and turning it into real life.
I can't wait to start on Christmas 2015!

The Details:
Different flavors of hot cocoa, premixed in each cup
Hand whipped milk to mix in
Giant marshmallows on a stick
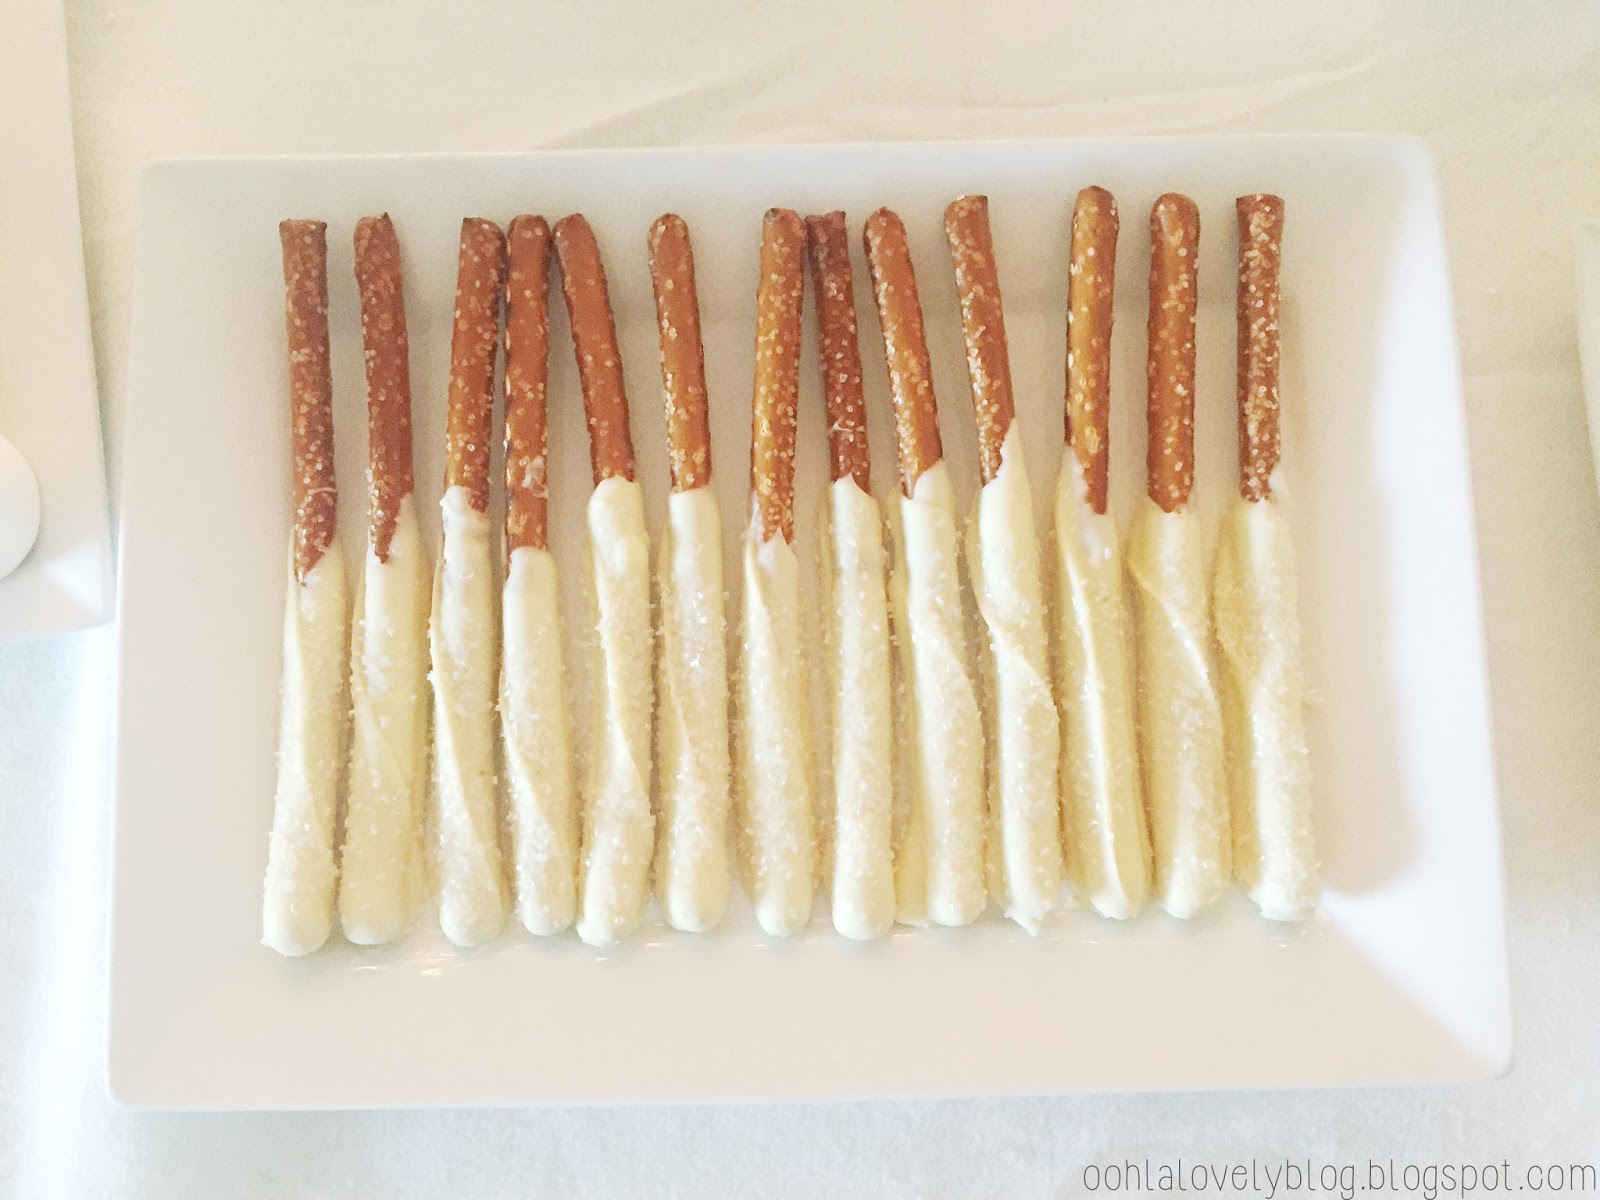
White chocolate dipped pretzels covered in sparkly sugar crystals
Powdered donuts
French macarons filled with a white chocolate ganache (recipe coming)

You better believe we all went home in a sugar induced coma. I like to think it was worth it thought. I can't wait to start planning next year's party!

Sunday, December 7, 2014

Christmas Cookie Series #4: Sugar Cookies


Growing up, I was never a fan of sugar cookies. 
I thought they were boring and the taste was, meh. 
Once I started baking I knew that I needed to conquer this cookie and I set out to find the perfect recipe. 
After trying a few recipes and being disappointed with it's outcome I decided that it wasn't the recipe and that it was me. 
But that all changed when someone passed along this recipe to me while I was in hair school. 
And I've now realized that it actually wasn't me, it was other people's recipes. 
The truth is rough sometimes.
But I am forever grateful that I now have a delicious sugar cookie recipe for my recipe box.
This cookie is so easy and it calls for just a few ingredients. I hope you all enjoy!

Ingredients
makes approx. 3 dozen, depending on size of cookie
  
8oz package of cream cheese, room temp
1 1/2 sticks of salted butter, room temp
1 cup granulated sugar
2 tsp vanilla extract
2 1/4 cups flour
1/2 tsp baking soda  

In a large mixing bowl, cream together cream cheese, butter, sugar and vanilla. Next, add in flour and baking soda. Mix until well combined. Cover your mixing bowl with plastic wrap and chill in your fridge for 20 minutes.
While your dough is chilling, preheat oven to 350 degrees.

*Here is my tip for rolling the dough and transferring your cookie cutouts. Use the precut parchment baking sheets. Lay a sheet out on your working surface and lightly flour it. Dump your dough onto the parchment and roll it out there. Once you've cut your cookie shapes and peeled away the excess dough, carefully transfer the paper with your cookie cutouts onto your baking sheet.

Bake for 8-12 minutes, or until edges are slightly golden (9 min for me).
Let your cookies cool for 1 minute on the baking sheet before transferring them to a cooling rack.
Cool them for at least an hour before attempting to decorate or you will have a big melt-y, frosting mess.

For the icing I use this recipe. It's a glace icing and it's amazing. I love the way royal icing looks but I cannot stand the taste. I find it quite disgusting actually. This icing is awesome. It hardens enough to decorate and package but is actually tasty and enjoyable to eat. So check it out, and use it. You won't regret it.

Monday, December 1, 2014

Christmas Stove Top Potpourri

Today I am sharing 2 ways I make my home feel like Christmas. 
One of my favorite ways to make my home smell like Christmas is by making a simmering pot of delicious smells.
These are seriously so easy to throw together and you can do just about any flavor combination you love. 
I love the smell of apples, citrus, and cinnamon, so that's what I threw into my pot.
So in place of lighting a candle, try this instead! 
Your home will smell so yummy that your husband will actually comment on how great the house smelled as soon he walked in the door. 
True story. 

Ingredients

1 1/2 cups fresh cranberries
1 granny smith apple, sliced
1 orange, sliced
3 whole cinnamon sticks
1/4 tsp nutmeg
1 1/2 tsp vanilla extract or 1 vanilla bean
4 cups of water

Dump all of your ingredients into a medium sized sauce pan, and simmer over low heat for hours. If your level starts to get low, add a few cups of water and keep simmering. My pot lasts me about 3 days before I dump it out and start with a fresh batch. Enjoy your delicious smelling home!

*never leave your pot simmering while you are out of the house. This should be common sense but sometimes things get forgotten, and I don't want to be responsible for any one's homes burning down. Thanks.
The second way I bring on the Christmas joy is by playing Christmas music all day long.
 I know people are sticklers when it comes to their taste in Christmas music. 
I know this because I am one of them. I am very picky.
 I can't help it that some arrangements are just better than others.
(I'm reading this in my mind like Gretchen Wieners)
 Here is a summarized list of my favorite songs for the season!
 Happy 1st of December!


Saturday, November 29, 2014

Christmas Cookie Series #3: Thumbprint cookies


I am back in the kitchen baking up my favorite Christmas time cookies. 
I took the week...okay, 2 weeks off but I am getting my act together and whipping a few batches to get us caught up. 
Has anyone ever had the Ghiradelli chocolate filled thumbprint cookies? They are delicious and I cannot find the boxed mix ANYWHERE! It is super depressing.
I figured, if I can't find the mix anywhere, I'll just have to try to whip up my own batch.
So, today I am sharing these little chocolate filled thumbprint cookies. They are so easy to make and will make a great addition to your Christmas cookie platters.

Ingredients
makes approx. 2 dozen
original recipe here

2 sticks salted butter, room temperature
1 cup powdered sugar
2 tsp vanilla extract
teeny tiny, pinch of salt
2 1/2 cups flour

chocolate filling
1/2 bag of good quality, milk chocolate chips
4 tbs unsalted butter
*1 tsp light corn syrup

Preheat oven to 350
In the bowl of an electric mixer, cream together softened butter, powdered sugar, vanilla and salt. Mix for 2 minutes on medium/high speed. Slowly add in flour and mix on medium speed until well combined.

Take a tablespoon size of dough and roll into a ball. Place dough balls 1 inch apart on a parchment lined baking sheet. Bake for 10 minutes, remove from the oven and press *thumb* into the center of the dough to make an indentation. Place the cookies back in the oven for another 6-8 minutes, until the edges are light brown. Remove from the oven and place cookies on cooling rack.
 Once your cookies have cooled, make your chocolate filling. Place chocolate chips, butter, and corn syrup in a microwave safe bowl. Microwave in 30 second increments, stirring each time, until your chocolate is melted and smooth. Carefully fill your cookies with the melted chocolate.
 *I use the back of a teaspoon to make my "thumb" print. I don't know about you, but sticking my finger into a hot cookie and burning the crap out of it just doesn't sound enjoyable. But if you're into that kind of thing, then by all means, go ahead and stick your finger into the lava cookie
* I made my chocolate filling sans corn syrup because I didn't want to buy a giant bottle to only use a tsp of it. So I opted out of it just added extra butter to my chocolate to help smooth it out and keep it runny. I probably used an extra tbs of butter. I think next time I will actually buy the corn syrup. The butter just made the chocolate a tad too...buttery and rich.

I hope you guys enjoy these
 and if you've missed my past posts you can check them out here.

Wednesday, November 26, 2014

A Surprise Visit

Ready for this legit excuse for last weeks blog neglect? 
My mom AND sister surprised me last Tuesday!
 It was the greatest surprise ever!
 Here's how it went down: My husband said he had to go pick up a merch order for work from some supplier. I was a little hesitant about him going to this area by himself because it's known to not be super safe. He insisted he'd be fine and had me stay home and get Evan ready for bed. At about 8:00pm he walked through to door and acted normal. Then about 30 seconds later there was knock on our door. That is totally out of the norm because no one comes to our door. 
Evan ran to the door to open it and my mom slowly peeked her head in.
 I was so shocked. 
I don't know exactly what my face or reaction was because it is such a blur now, but I'm assuming it looked something like those little emoticon faces that has the shocked look with the hands on his face, and then it quickly turned into the face with the tears pouring down their face. 
Yep, that was me. 
When I finally calmed myself down another knock on the door happened. I opened it and it was my sister. 
I'm pretty sure I just said "stop it." And cried and hugged her. 
I haven't seen my sister in over a year so this was extra special. 
Their visit was so amazing and I wish it could have lasted longer. 
During their short trip we had amazing weather if you live here because it was rainy, windy, and chilly. It was bad weather if you're visiting and wanted to take advantage of the warm sun and beaches. 
Because of the weather we didn't spend much time at the beach. The first day here I took them down to Lincoln Road Mall and had the most delicious pizza and of course, had to stop at Laduree. I think my sister would have punched me if I didn't take her there. 
Day 2 was spent driving out to the Ft. Lauderdale temple and then spending a few hours at the he beach and pool at the hotel they were staying at. 
Day 3 was a short day. 
They had a flight out around 5pm so we only had a half day. We spent it at Target and at my apartment.  I can't complain about that...at my favorite place with my favorite mom and sister. It was a good day.
 Saying good bye is always hard, but I know we will have a lot of fun adventures coming up in the next few months, so that helps heal the wounds. 
Just a few pictures from their short stay....

 Evan loved having his aunt Bree and NeeNees here

 He seriously HAS to climb and jump on everything
 I'd kill for a pistachio macaron.


 Stormy weather couldn't keep these 2 out of the water

 My favorite picture, ever.

The view from my mom's room. Not too shabby.

It was a wonderful 3 days. A big thank you to my mom, sister, and husband for making this all happen. Until next time...